Setting up IKEv2 VPN access through Blackberry Playbook.
1. Download and extract the Certificate file
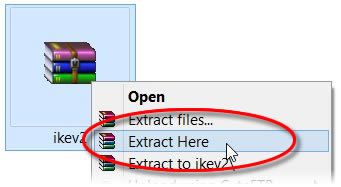
Download and extract our Blackberry certificate file to a good location on your computer.
Click here to download our certificate file.
2. Blackberry Settings
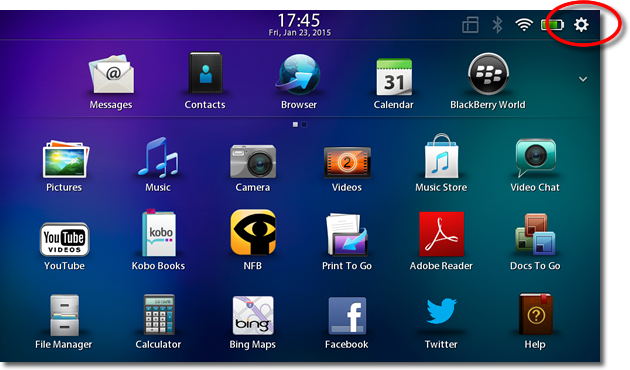
Click onto the settings icon on your Blackberry
3. IP Address
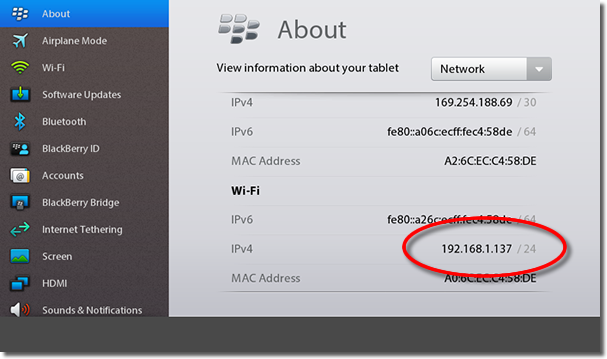
You now need to find your Blackberry Playbook IP address in order to connect to it from your computer. To do this click onto ‘About’ > then change the information dropdown top Network and you will see your IPv4 IP Address in the Wi-Fi section.
4. Enable Sharing
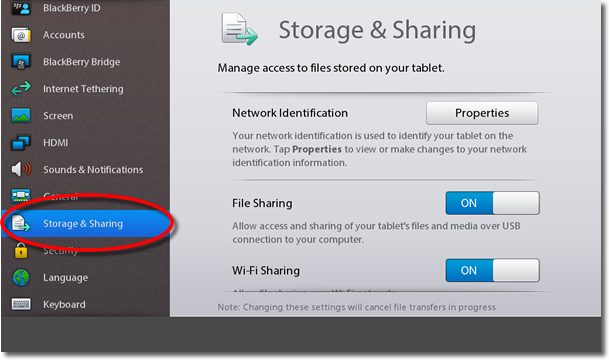
Go to ‘Storage & Sharing’ and ensure ‘File Sharing’ and ‘Wi-Fi Sharing’ is enabled. You may need to restart the Playbook once these are enabled.
5. Connect to Playbook
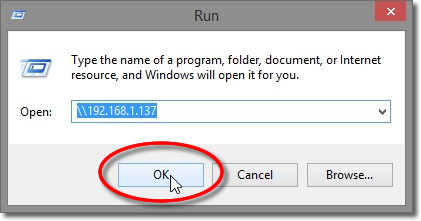
Go to Run on a PC or Network on a Mac and connect to your Playbook by entering the IP Address in the following format ‘IP Address’
6. Certificates Folder
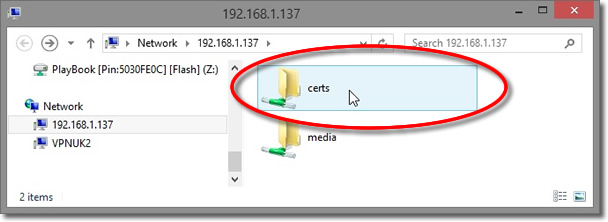
Open the Certificates folder on your connected Playbook.
7. Drag and Drop
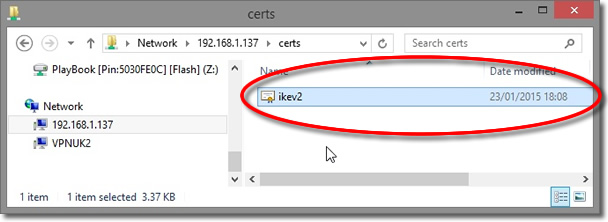
Drag the IKEv2.cer certificate file that you downloaded earlier to the ‘Certificates’ folder.
8. Import Certificate
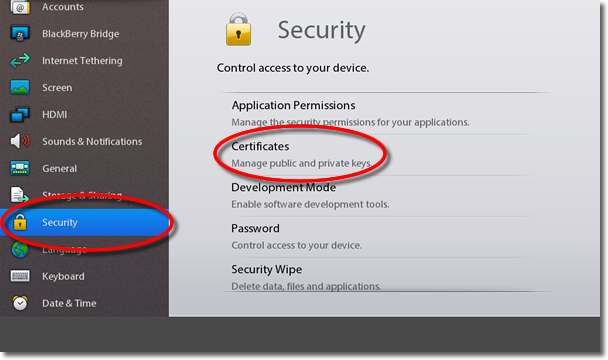
We can now import the certificate to the Blackberry Playbook ‘Certificates’ store.
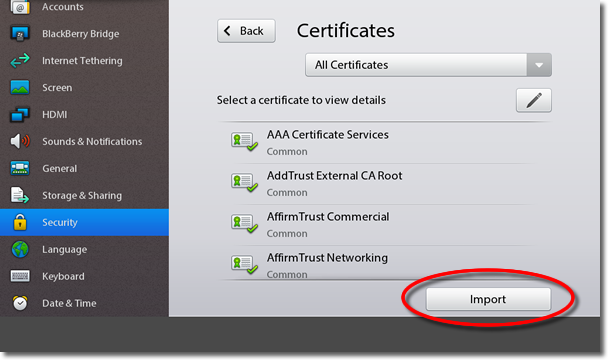
9. Import
Click onto the ‘Import’ button.
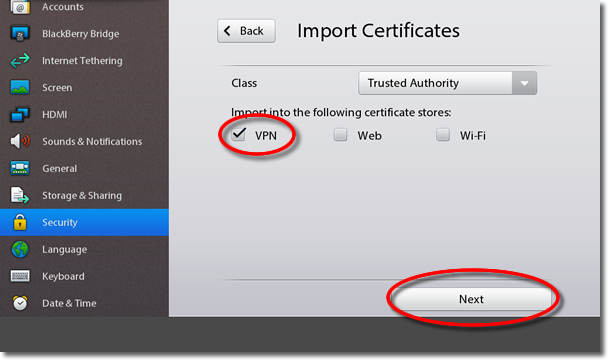
10. Choose Store
Choose the ‘VPN’ certificate store and click onto the ‘Next’ button.
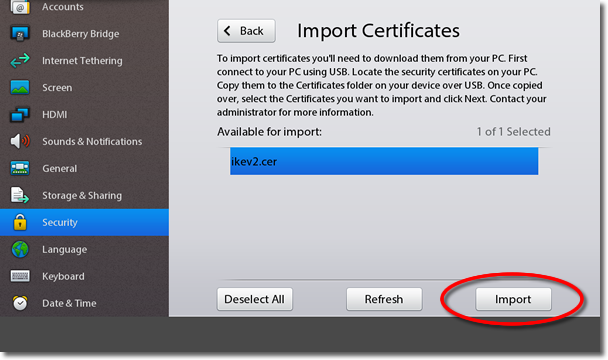
11. Select certificate
Highlight the certificate you hae imported to the certificates folder and then click onto the ‘Import’ button.
12. Confirm
You can confirm the import was successful by scrolling down your certificates, you should see ‘VPNUK Root CA’.

13. Create VPN Connection
We can now create the VPN copnnection. Go to ‘Securty’ > ‘VPN’.

14. Add New
Click onto the ‘Add New’ button.

15. Profile Details (Pt1)
Enter the Following details.
1. Profile Name: Anything
2. Server Address: Enter your chosen ‘Server. You can find the server address in your ‘Welcome to VPNUK’ email and also in your client control panel on the VPNUK website.
3. Gateway Type: Generic IKEv2 VPN Server.
4. Authentication Type: EAP-MSCHAPv2.
5. Authentication ID Type: Email Address.

16. Profile Details (Pt2)
Enter your VPNUK login username into all three of the ‘Authentication ID, MSCHAPv2 EAP Identity and MACHAPv2 Username’ fields. Enter your VPNUK Password into the ‘MSCHAPv2 Password’ field.

17. Profile Details (Pt3)
Enter the following details
Gateway Auth Type: PKI
Gateway Auth ID Type: Fully Qualified Domain Name.
Gateway Auth ID: Enter the same server address as you entered into the ‘Server Address’ field.
Gateway CA Certificate: Choose ‘VPNUK Root CA’.
Perfect Forward Privacy: ‘Enabled’.
Then click onto the ‘Save’ or ‘Save and Connect’ button.

18. Connected!
You should now be connected to the VPNUK Service.


