Setting up your VPNUK access on Apple iPhone iOS
Setting up vpn access on the Apple iPhone is quick and easy. The following instructions will take you step by step in setting up your account through and L2TP connection.
1. Settings
Go to ‘Settings’.

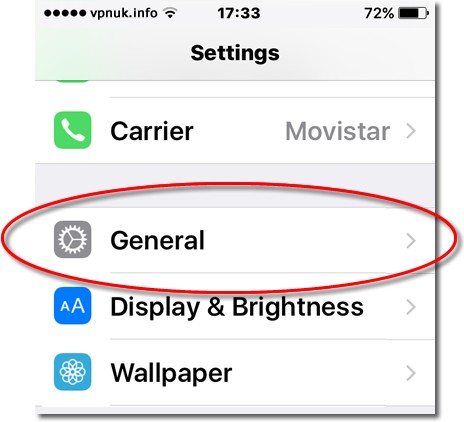
2. General
Click onto ‘General’.
3. Network
Select ‘VPN’.

4. Configuration
Click onto ‘Add VPN Configuration…’.

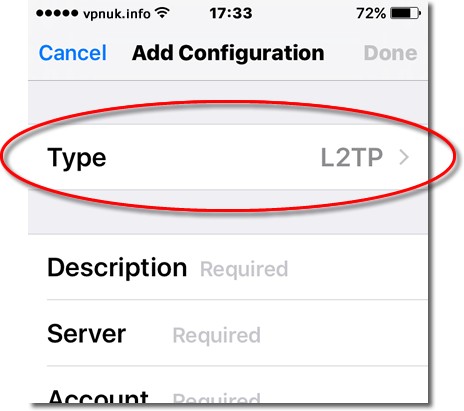
5. Type
Click onto ‘L2TP’ followed by ‘Back’.

6. Type L2TP
The ‘Add Configuration’ overview should now have the ‘Type’ set to ‘L2TP’.
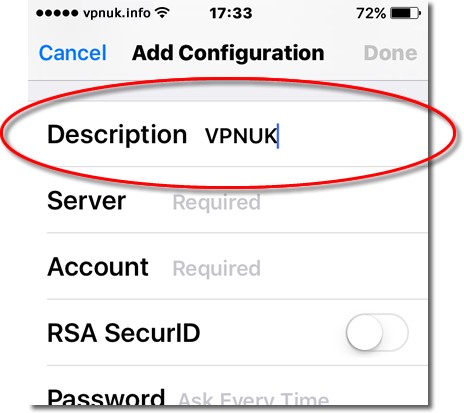
7. Description
You can enter any name you like into the ‘Description’ field.
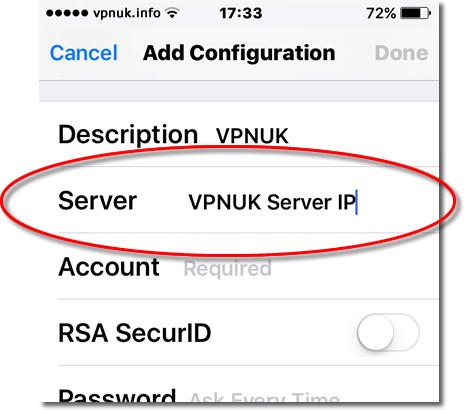
8. Server
Enter a valid VPNUK server IP or Server DNS name into the ‘Server’ field. If you have an account on the Shared IP platform you can enter any VPNUK Shared IP server details into the field, Accounts on the Dedicated IP platform should enter the server Connecting IP. You can find the server information in your ‘Welcome to VPNUK’ email or in the ‘Members Area‘ on the VPNUK website.
9. Account
Enter your VPNUK login username. You can find your VPNUK login username in your welcome email.
Note: Usernames are case sensitive, please ensure they are exactly as displayed in your welcome email.

10. Password
Enter your VPNUK login Password. You can find your VPNUK login password in your welcome email.
Note: Passwords are case sensitive, please ensure they are exactly as displayed in your welcome email.
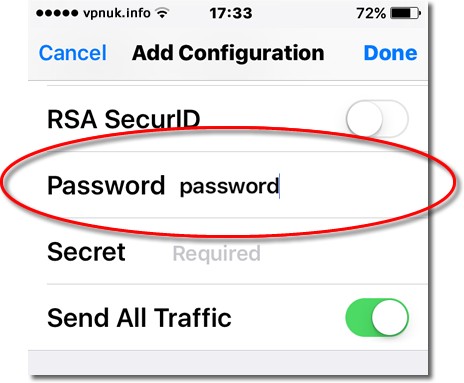
11. Secret
Enter the VPNUK Secret, with VPNUK this is always: 69000903.

12. Send all traffic
Ensure the send all traffic slider is set to the ‘ON’ position.
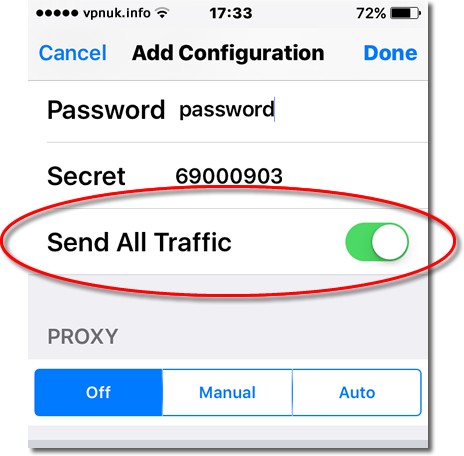
13. Proxy Off
Ensure ‘PROXY’ is set to ‘Off’.
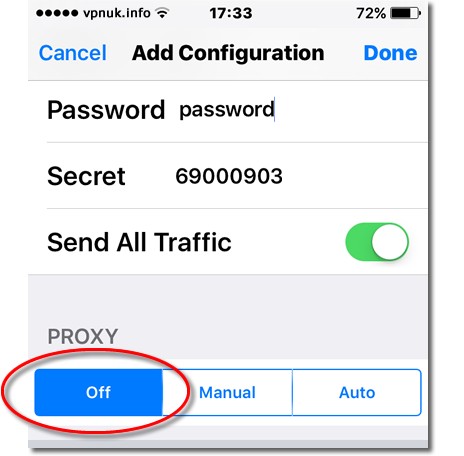
14. Save Settings
Click onto ‘Done’ to save the configuration.

15. Connection Complete
Your VPNUK connection is now setup and ready for you to connect.

16. Connecting for the first time
In order to check the connection is working correctly you should now toggle the ‘Status’ slider to the ‘ON’ position and the status will change to ‘Connecting’.

17. Connecting for the first time
Once connected the status will change to ‘Connected’.
Note: If the connection fails for any reason you should click onto the VPNUK connection ‘i’ and then ‘Edit’. You should then ensure all of the settings are all correct. Please ensure the server, login and secret details are all correct and do not contain any uppercase letters or white spaces.
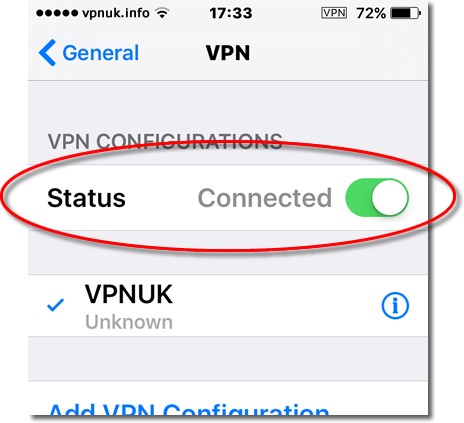
18. Connecting/Disconnecting
Toggle the ‘VPN’ slider to the ‘ON’ or ‘OFF’ position to connect or disconnect.
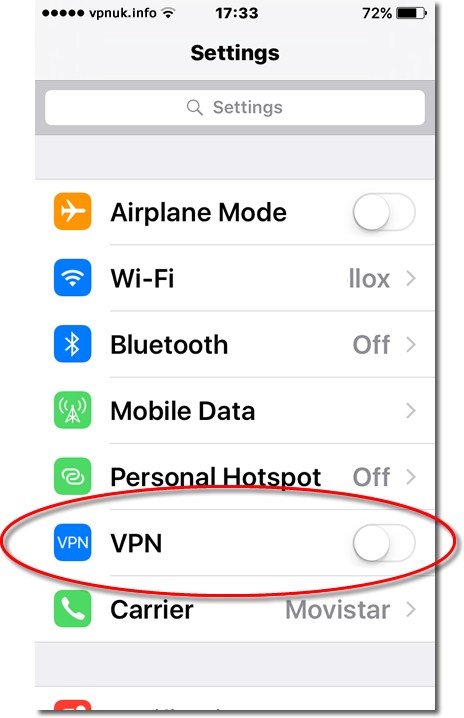
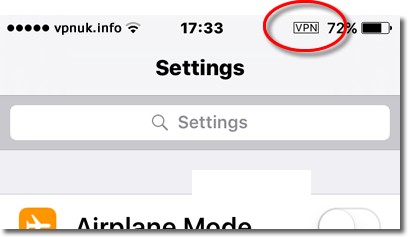
19. Confirming connection
Whilst the VPN is connected there will be a ‘VPN’ notification icon displayed in the status bar.
Troubleshooting Guide
Your VPNUK account should work first time, everytime. If you ever experience any problems with your VPN connection the first thing we urge you to do is contact us on our Live Help service, we can offer instant assistance with all connection issues and get you back online. The following is a basic troubleshooter for the more common issues that can arise from our VPN service.
IMPORTANT: If the connection fails for any reason you should you should ensure all of the connection settings are correct. Default login details assigned by our system will never contain any uppercase letters or spaces. Its also worth checking for white spaces that can sometimes appear if you copy/paste details.
ISP DNS Hijack / DNS Leak Protection
Some ISPs will attempt to hijack your DNS settings which hinders the VPN connection from functioning correctly. If you find that your VPNUK connection does not route your traffic correctly you can try changing your Public DNS server to the VPNUK DNS server or to an alternative like Google DNS.
1. Go to Settings.
2. Go to ‘General’.
3. Go to ‘Network’.
4. Select the connection type you use to access the internet.
5. Select your connection properties from the list of available networks.
6. Change ‘DNS’ to the VPNUK Public DNS server: 109.169.6.2 or the Google Public DNS IP address: 8.8.8.8.
7. Thats it!
