Installing OpenVPN 2.6.6 Standalone
The following instructions go step–by–step through an OpenVPN installation on Windows.
In order to connect to your VPNUK account you will now need a configuration file. You can download a pre-configured profile from our server: Click Here
IMPORTANT: In order to avoid any software confilcts please ensure all older or alternative VPN connection software (including OpenVPN) is removed in full from your Windows system before installing any new version of OpenVPN.
1. Download OpenVPN
You can download OpenVPN 2.6.6 for 64 bit systems from here: OpenVPN 2.6.6 (64 Bit) or you can download OpenVPN 2.6.6 for 32 bit systems from here: OpenVPN 2.6.6 (32 Bit) . If you have any problems downloading or installing files from our server please contact our Live Help team, we are always available to help. We also have an older version of OpenVPN here which is compatible with all versions of Windows: OpenVPN 2.4.6 (All Windows Versions)

2. Install OpenVPN
Double click onto the OpenVPN 2.6.6 installer file.

3. UAC Permissions
If you receive a User Account Control prompt click onto the ‘YES’ button, to allow the installation.

4. Install OpenVPN
Click ‘Next’ to initiate the installation.

5. License Agreement
Click ‘I Agree’ to confirm you agree to the license agreement.

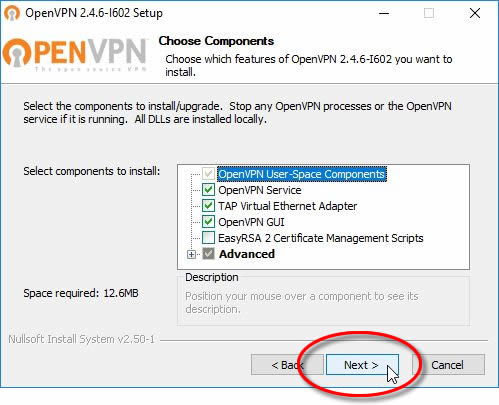
6. Components
Click ‘Next’ to confirm the components.
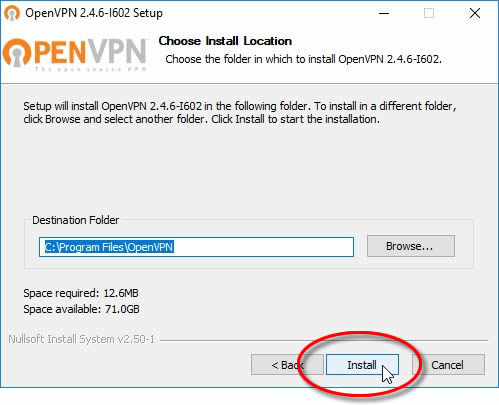
7. Install Location
Ensure the location is to your liking and then click onto ‘Install’.
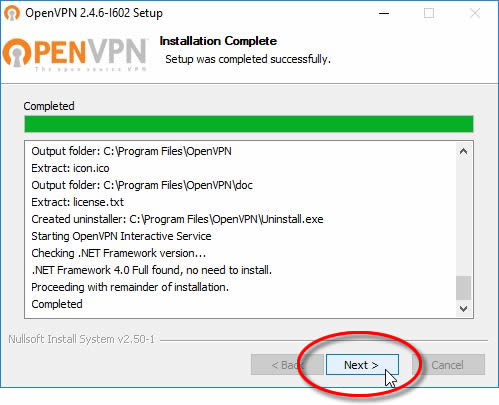
8. Installation Complete
Click onto the ‘Next’ button once the installation completes.
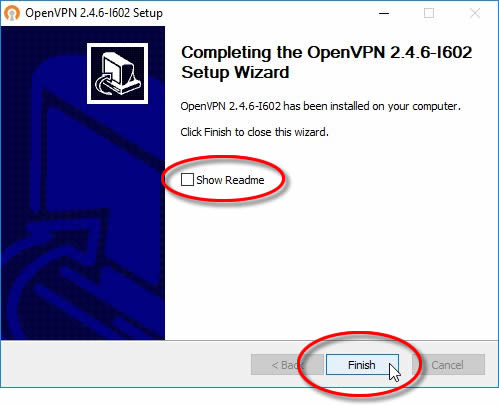
9. Finish Installation
Click onto the ‘Finish’ button. OpenVPN is now installed on your system.
Tip: Unceck the ‘Show Readme’ checkbox.
10. Set Permissions
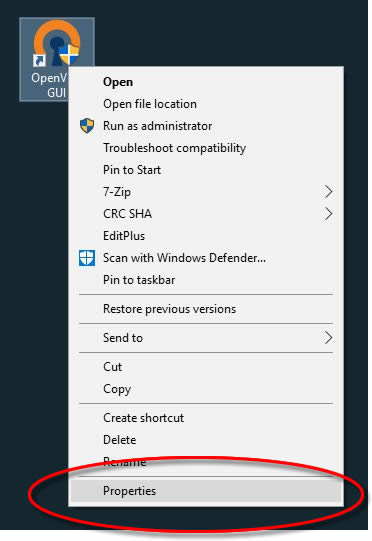
Right click onto the newly created ‘OpenVPN GUI’ desktop shortcut and click onto ‘Properties’.
11. Compatibity Tab
Click onto the ‘Compatibility’ tab.

12. Run as Administrator
Place a check in the ‘Run this program as an administrator’ checkbox, then click onto the ‘OK’ button.

13. Download your first Profile
In order to connect to your VPNUK account you will now need a configuration file. You can download a pre-configured profile from our server: Click Here

14. Fetch Your Profile
You Have three options for fetching your profile from our server
A. Download your TCP configuration (Recommended).
B. Download your UDP configuration.
C. Have our system email both configurations to you.

15. Start OpenVPN
Click onto the ‘OpenVPN GUI’ desktop shortcut.

16. Confirmation
You may receive a User Account Control prompt, click onto the ‘Yes’ button.

17. Missing Configuration
OpenVPN will inform you that you do not have a connection profile. Click onto ‘OK’.

18. Import Profile
Right click onto the OpenVPN GUI icon which is now located in the sys tray.

19. Locate Profile
Locate the OpenVPN configuration file that you either downloaded or was emailed to you earlier.

20. File Imported
You will receive a confirmation that the profile has been imported. Click ‘OK’.

21. Connecting to VPNUK through OpenVPN
Right click onto the OpenVPN GUI in the sys tray and select ‘Connect’. If you have multiple profiles, choose the server you would like to connect to and select ‘Connect’.

22. Enter your login credentials
THe first time you connect to VPNUK through OpenVPN you will be asked for your login credentials.
A: Your VPNUK login Username.
B: Your VPNUK login Password.
C: Place a check in the ‘Save Password’ box, to save your password.
D: Click onto the ‘Connect’ button.

23. Connected!
Thats It! You should now be connected to VPNUK through OpenVPN 2.4.10.

