Setting up VPNUK SMART DNS on Raspberry Pi.
1. Registering your IP on the SmartDNS service
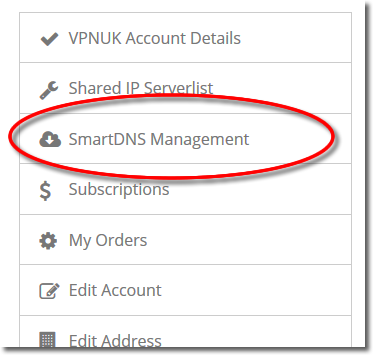
Login to the Members Area using your user account login username and password. Go to the ‘SmartDNS Management‘ menu item

3. Set my IP
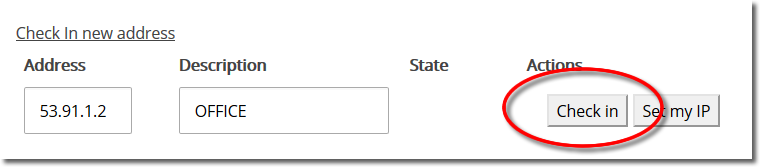
The Smart DNS system can set your current IP address if you do not know what it is. Click onto the ‘Set my IP’ button, that will reveal your current IP address in the Address field.
IMPORTANT: If you change location, or if your IP address changes you will need to check-in the new IP. For example, if you are using wi-fi, at home, and then go to an outside location and use a wi-fi hotspot, you will need to check-in that new IP address. You will then need to check-in your home IP once you return home. Each IP address you use to access the internet has to be checked in before you can access the SmartDNS service.

4. Check in your IP
You can add a description for the IP or hostname you are checking into the Smart DNS system, once you are happy with the Address and the Description click onto the ‘Check in’ button.
5. Registered
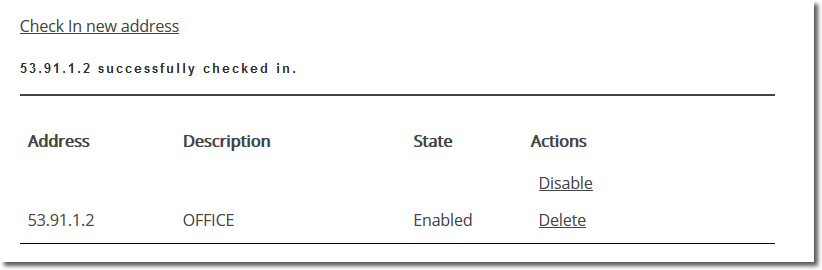
The Smart DNS system will confirm your IP address has been registered, it takes just a couple of seconds become enabled on the service.
6. Get SmartDNS IP
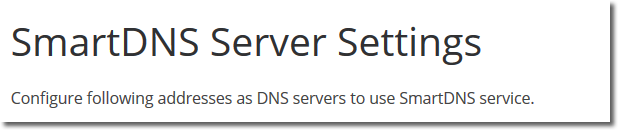
Scroll down to the ‘SmartDNS Server Settings’ section.
7. Copy IP
Copy or make a note of a ‘SmartDNS Server IP’ that you would like to use, you will need this later in the setup.
8. Open LXTerminal
Go to LXTerminal on the Raspberry Pi, a shortcut should be on the desktop.
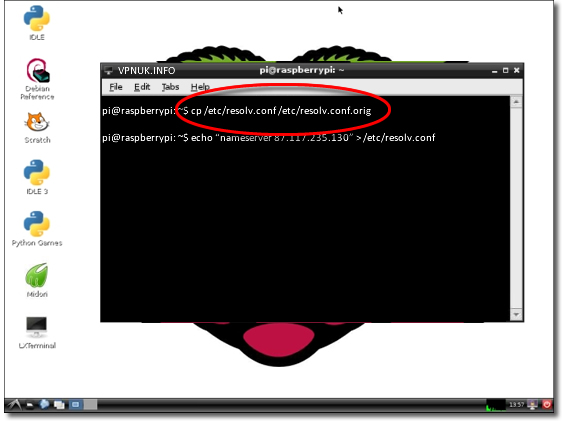
9. Backup the resolv.conf file
Enter the following command to backup the DNS config file: cp /etc/resolv.conf /etc/resolv.conf.orig
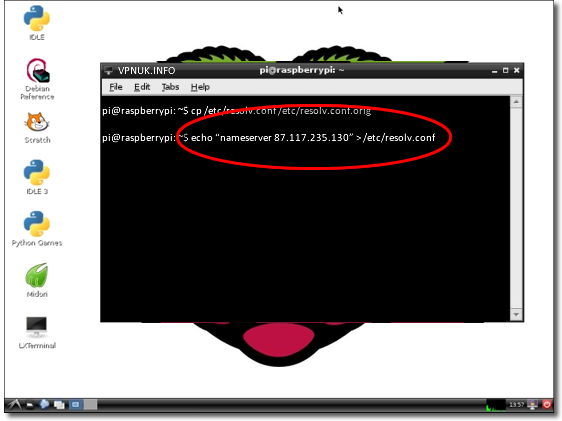
10. Change the DNS Address
Enter the SmartDNS IP command: echo “nameserver 87.117.235.130” > /etc/resolv.conf
To use the USA server enter: echo “nameserver 174.36.42.73” > /etc/resolv.conf
VPNUK Connection Setup Tutorial
Thats It! In order to be sure the settings are active you should restart your Raspberry Pi.