Older macOS?
← Monterey / Big Sur guideSetting up IKEv2 VPN on macOS (Ventura / Sonoma)
The following guide shows you how to connect to VPNUK using the built-in IKEv2 client on macOS Ventura (13) or later. The setup takes just a few minutes and no extra software is needed.
Your VPN username and password are in the Members Area under VPNUK Account Details. These are different from your Members Area login. Your server address is in your Welcome to VPNUK email or in the Client CP. Dedicated IP subscribers should use their dedicated server address only.
Important: Always enter the server DNS hostname (e.g. your-server.vpnuk.net) in both the Server address and Remote ID fields — never the server IP address. The same hostname is used for both fields.
Click the Apple menu
Click the Apple logo in the top-left corner of your screen.
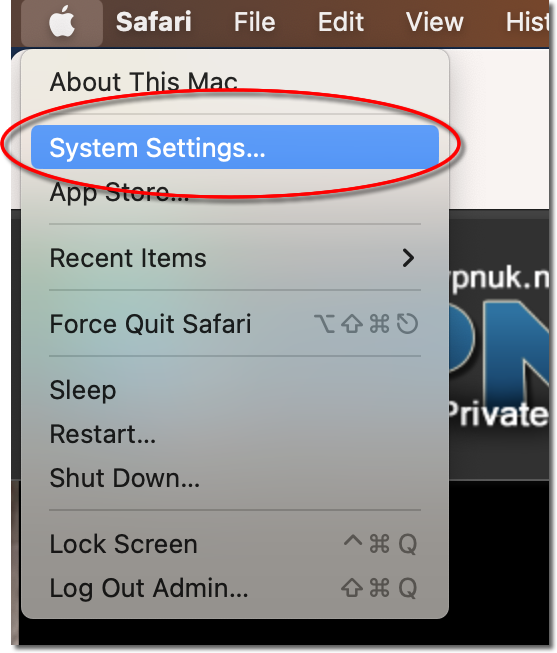
Open System Settings
Select System Settings… from the Apple menu.
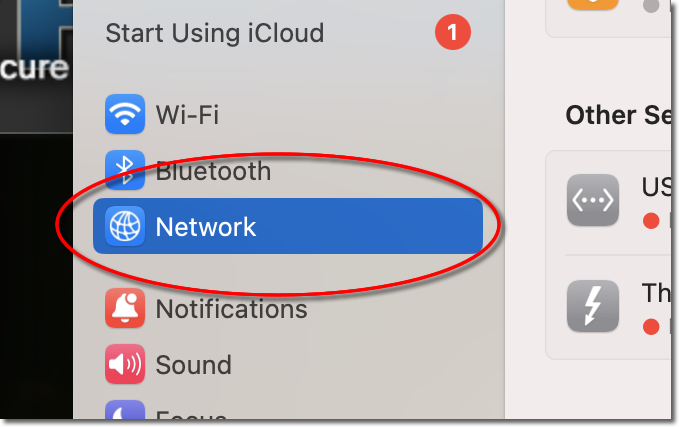
Click Network
In the System Settings sidebar, click on Network.
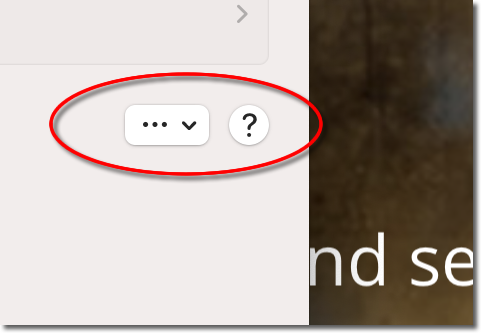
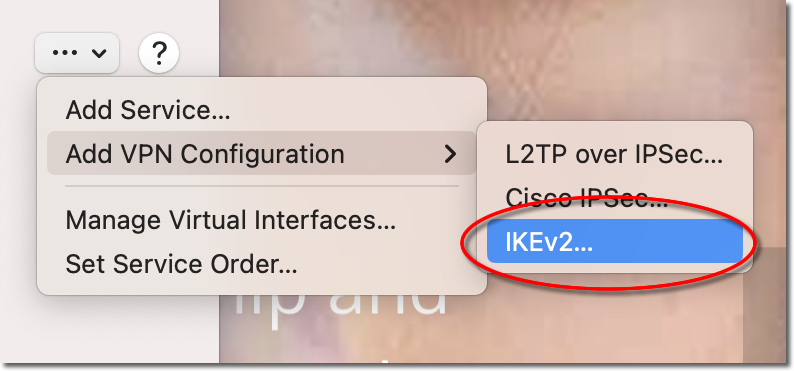
Click the action button (…)
At the bottom of the network list, click the three-dot (…) button with the dropdown arrow.
Add VPN Configuration — IKEv2
Hover over Add VPN Configuration then select IKEv2… from the submenu.
Enter a Display Name
In the Display Name field, enter a name for this connection — for example VPNUK IKEv2.
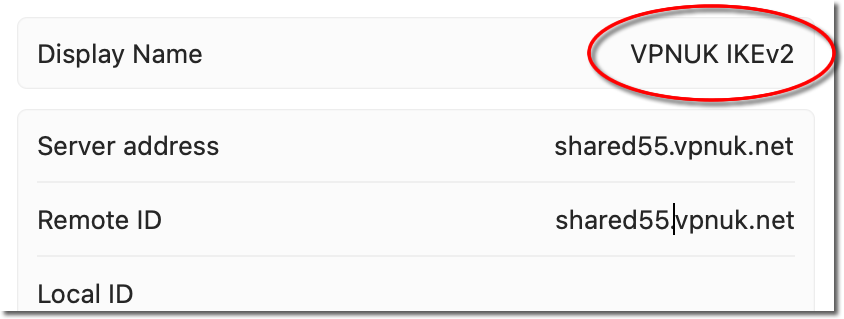
Enter your Server address
In the Server address field, enter your VPNUK server hostname (e.g. your-server.vpnuk.net). Shared IP users can use any server from the pool. Dedicated IP users must use their own dedicated server hostname.

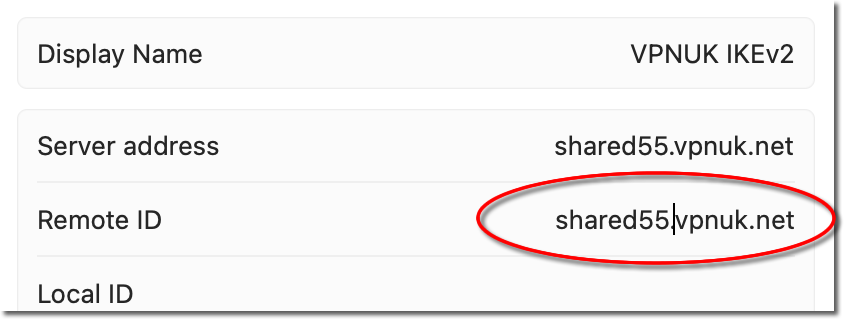
Enter the Remote ID
In the Remote ID field, enter the same server hostname you entered in the Server address field (e.g. your-server.vpnuk.net). Leave Local ID blank.
Set Authentication Type to Username
Under Authentication, click the Type dropdown and select Username.
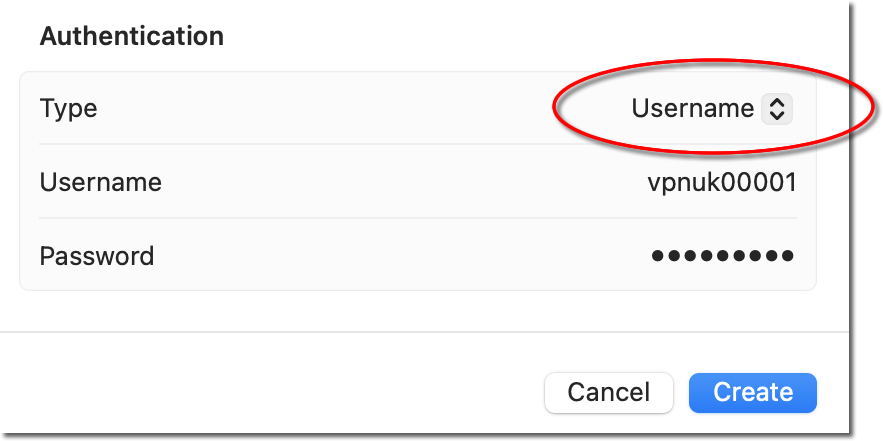
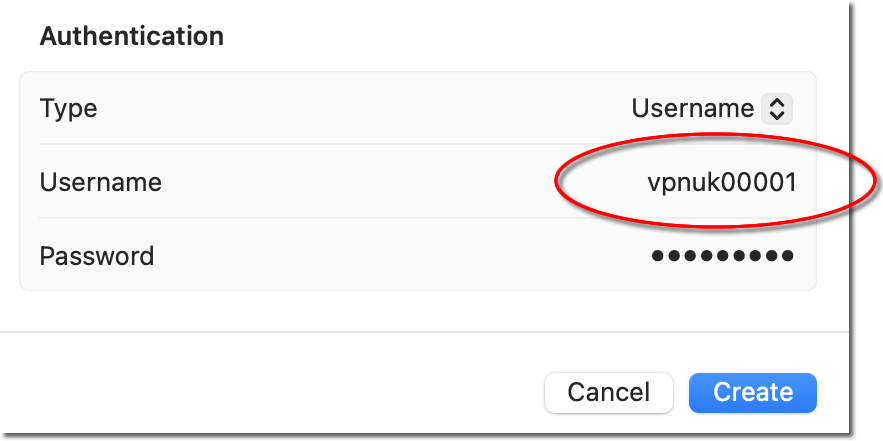
Enter your VPN Username
In the Username field, enter your VPNUK VPN username (found in the Members Area under VPNUK Account Details).
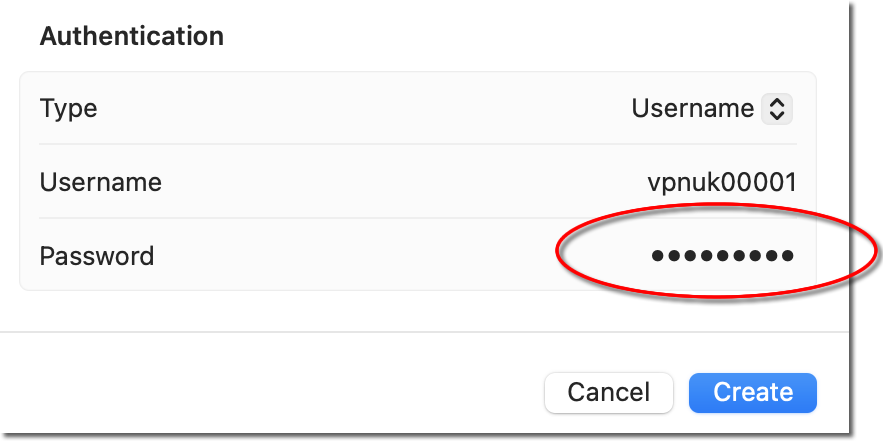
Enter your VPN Password
In the Password field, enter your VPNUK VPN password (found in the Members Area under VPNUK Account Details).
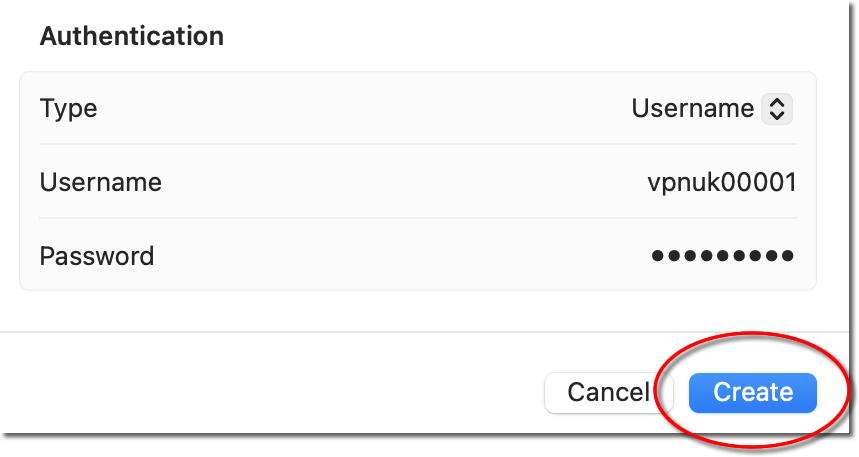
Click Create
Click the Create button to save the VPN configuration.
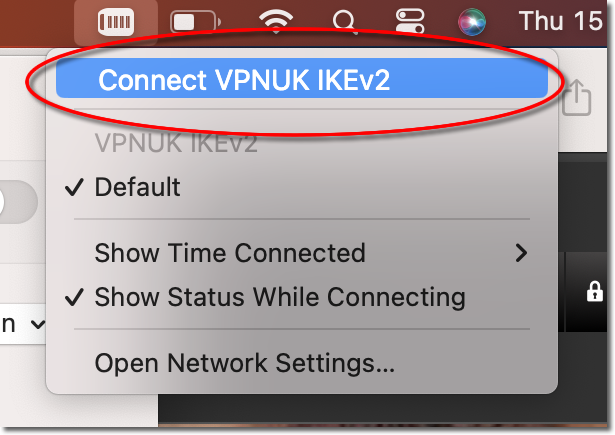
Connect to VPNUK
Click the VPN icon in your Mac's menu bar and select Connect VPNUK IKEv2. You can also connect from System Settings → Network by clicking the toggle next to your VPNUK IKEv2 connection.
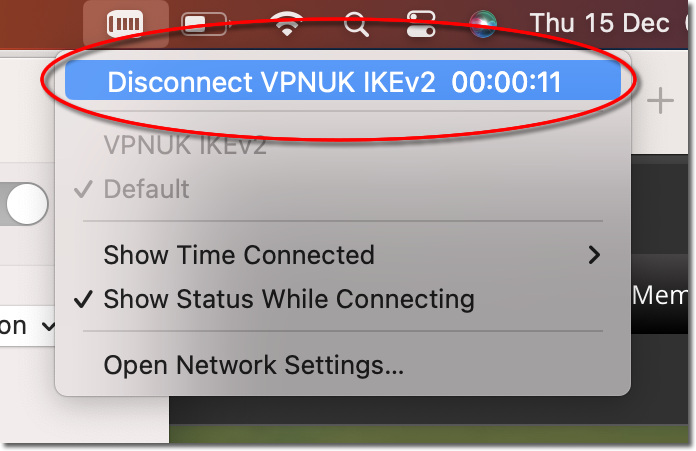
Connected!
The menu bar will update to show Disconnect VPNUK IKEv2 along with your connection time, confirming you are now connected. Your internet traffic is now encrypted and routed through VPNUK.
Troubleshooting
Connection fails immediately
- Ensure the Server address and Remote ID are identical and use the DNS hostname, not an IP address.
- Double-check your VPN username and password in the Members Area under VPNUK Account Details.
- Try a different server hostname from the Client CP.
No VPN icon in the menu bar
After creating the connection, go to System Settings → Network, click your VPNUK IKEv2 connection and enable "Show VPN status in menu bar".
Using an older macOS?
On macOS Monterey or Big Sur the VPN settings are in System Preferences → Network. See our legacy IKEv2 guide for step-by-step instructions.
Still need help? Our support team is available 24/7 via live chat, WhatsApp and telephone. Contact us here.